A collection of teaching tools, inspirations, & reflections

Category: EdTech (Page 1 of 3)

Final Tech Class

  • Class website will stay live, so can refer to it
  • Looking back:
    • Open ed resources
    • Telepresence Robots
    • Blogging – start to a professional portfolio


  • VR experience
    • We got to use the VR rooms at UVic, and have a choice of a rollercoaster ride, experiencing google earth, or 3D painting.
    • Have goggles on, so you can’t see any of the real world around you
    • Can sometimes have some side effects of nausea or disorientation – just need to remove goggles and passes quite quickly
    • I chose 3D painting, and after a bit of a learning curve for how to use the program, was able to figure out how to make shapes and paint them


  • Augmented reality
  • Image result for augmented reality
    • accentuating the world around you (like Pokemon Go)
    • Aris app – Kitsilano Highschool used this app to learn about the events of 1944 around their school. Then move into the school to scan QR codes that leads them to information throughout the school.
    • HP Reveal: step by step instructions
      • Can log in and scan objects around the class to see what people have linked to them.

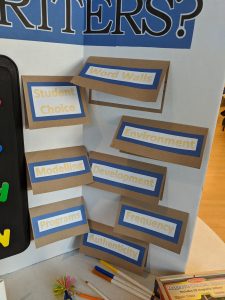
Gallery Walk Posterboard

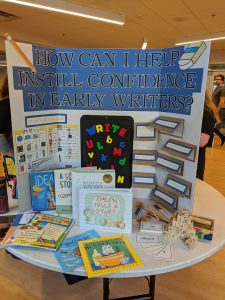
This week’s arts and crafts were made up of a lot of cutting and gluing. We had to create posters for our Inquiry Gallery Walk for our Field Experience seminar.

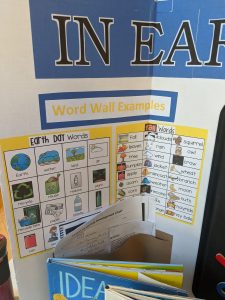
My Inquiry for the term was “How can I help instill confidence in early writers?”.

Although I didn’t take pictures of the process of making my board, I did make sure to take some pictures of the finished product.

  Flaps! Great way to make a presentation board more engaging.

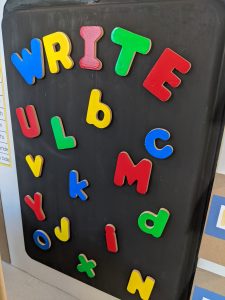
  Magnets! I painted an old baking sheet, and used it as a magnet board to show other ways to engage learners in writing.

  More cutting and pasting..

  The whole setup!

November 22 Class Notes

Presentation on Using Technology in Outdoor Education:

  • Pros:
    • enhances learning in the outdoors – increases access to info
    • collaborating on a global scale
  • Cons:
    • all the apps require having some sort of device to be able to experience it
    • depends on funding of school
    • technology could detract from their outdoor experience (distracting)
  • Apps:
    •  INaturalist:
      • Useful in identifying any types of plants or animals
      • can upload photos and become part of the observational data – research grade
      • free app!
      • collaborating with people all over the world
    • BioBlitz:
      • a communal citizen-science effort to record as many species within a designated location and time period as possible
    • Seek:
      • free app by INatualist
      • identifies species that you see — much more user friendly
      • doesn’t contribute to the research database
    • ITrack Wildlife:
      • facilitates learning about animal tracks
      • there is a cost associated ($8)
    • Merlin:
      • free bird identification app
      • answer questions or take picture of bird and it will come up with information about the bird
      • will give you a map of where you can find that bird, and can play bird calls
      • live webcams to watch
      • interactive activities for kids (ie. extinct species, anatomy, etc)
    • Marine Debris Tracker:
      • an open data citizen tracker
      • can log where you’ve cleaned up beach debris and contribute to research
    • Peak Finder:
      • Can hold up your phone and it will tell you the mountains you’re seeing
      • $4.99
      • can do camera view, topographic view
    • Peak Visor:
      • free version of naming mountains
    • Globe Observer:
      • citizen science app
      • tracking weather, mosquitoes, tree height, and land cover
      • goes through scientific steps of the scientific process
    • NASA app:
      • free to download
      • amazing satellite pictures
      • wonderful way to learn about space
      • live stream of the ISS
        • could track weather patterns from this
    • Skype A Scientist:
      • can skype call from your classroom to an actual scientist
      • free service
      • resources on the website so that you can get to know them beforehand and help to come up with questions


Language and Communication Technology:

  • How can we bridge the communication gap in the classroom?
  • Language Technologies:
    • BC has the 2nd highest immigration population in Canada
    • Looking to the UN for inspiration:
      • use technology to connect all the different languages that come into one space
    • Google Translate:
      • how to connect with ELL students
      • can translate text to text, conversations, use the camera to translate text, can upload worksheets
      • Cons: not perfect, does make some mistakes, difficulty if in a noisy setting or with quiet voices, puts a pause in the conversation to take time to translate
      • be sure to take a close look at what it’s asking you to consent to (like keeping your images — can turn this off)
    • Powerpoint:
      • has a subtitle option to translate what you say during the presentation into a different language at the bottom of the slide
      • can also record your slide and draw on the slide and then will show as you present
        • good for students who are just learning the language, so they could take the presentation home and work on it at their own pace
    • WT2 Translator:
      • 2 headphones, one for each person to wear
      • can also translate through the app on your phone to ask questions to people in public
      • headphones are $300 – so a big investment
      • wouldn’t want to rely on this all day, and become dependent. Want the kids to work on their English skills as well
  • Assistive Technologies
    • Augmentive Alternative Communication
      • Touch Chat: pairs a written word on the screen with a photo
      • Great for non-verbal kids
    • Rewordify.com
      • kids can copy and paste a sentence they don’t understand and will convert some of the more difficult words into simpler ones
      • sense of autonomy
    • Video Modelling:
      • iMovie a student going through a daily routine, to help a student gain a grasp of what’s expected of them
    • Daily Schedules:
      • digital visual schedule
      • can add pictures of the student so that it’s more relevant
  • Have all children in the classroom become familiar with the assistive technology in the classroom so that it breaks down barriers and guides social interactions


Digital Storytelling Presentation:

  • Digital storytelling began by supporting personal discovery and emotional self-examination
    • has now shifted to powerful voice
  • digital storytelling is multimodal literacy that enables students to create a deeper understanding and emotional connection with their audience
  • 7 elements should be included:
    • POV: purpose of the story
    • Dramatic Question: that holds the viewers interest until the end
    • Emotional Content: connect with the viewer through the emotions felt
    • Voice: record the voice narration to help the meaning of the visual content
    • Soundtrack: adding music to complement the story
    • Economy: the way you use effects on an image changes the meaning
    • Pacing: between 2-4 minutes generally
  • Can easily link digital storytelling to the core competencies and self-assessments
    • I can statements
    • Identity – personal narrative
    • Social advocacy tool – agents of change
  • Going beyond personal narrative:
    • tale of Desperaux – using IMovie
  • Pros:
    • extremely multimodal – great way to work on their oral communication, written, technological
  • Cons:
    • time consuming
    • takes a lot of scaffolding
    • need equal access technology
    • for personal narratives – need students to feel psychologically safe in the classroom community
    • technology always has hiccups – but can use them as a learning tool (pro!)
  • Apps other than iMovie:
    • Comic Life – make comic strips — popular among elementary kids
    • Imagine Forest – focus on storytelling. Its free!
    • Speech Journal – traditional personal narratives. $3.99
  • Tips:
    • plan out stories in advance – storyboards
    • need set criteria so that expectations are clean, but still leave room for choice and creativity
    • need to scaffold learning of how to use the apps – want kids to know how to use the apps once it comes time to digitize their stories
    • can be used for lots of subjects! ELA, Socials, Science, Math, Art
    • Can use them as a teaching tool as well – flipped lessons, have students learn the concepts through teaching stories, and then class time can be used to collaborate on interactive work
    • Can increase participation with sick or absent students. Can access the content at home so that they don’t miss out on learning
    • Comprehensive way to see what students are taking away from your lessons. Content creators!


Presentation on How Video Can be Used in the Classroom:

  • may be thought of as a ‘cop out’, but is also a great way to engage students
  • Pros:
    • encourages digital literacy
    • can allow for experiences they may not be able to have in real life (travelling to other places)
    • can identify who the visual learners are – who’s engaging more with video than other teaching styles
    • can be used to replace written text that may not be as engaging
    • iMovie on Macs
    • Shotcut on PCs
    • youtube users must be 13 years or older, so not the best for the classroom
  • For longer videos: good to break it up into chunks to then be able to take a deeper dive into the meanings behind the videos in each portion
  • 3rd party tool:
    • EdPuzzle: way to share video with your students, can link to google classroom and show videos like khan academy, etc.
      • Can add prompts throughout video
      • can see how many students have accessed and how they’ve interacted
    • FlipGrid
  • Assessment:
    • pedagogical narration
    • how-to videos: can use flipgrid to create these. Great way to see what your students know
    • digital portfolios
  • Cautions & tips:
    • make sure to watch the whole video ahead of time
    • have a purpose behind the videos you’re using in class – be selective to what’s being shown
    • be mindful of accessibility to video creating tools
    • can use a “start at” function so that you don’t have to fiddle with where to start the video when presenting
    • can use auto-play function for when you bring the slide up


Coding in Education:

  • codebc.ca links coding resources to the curriculum
  • hourofcode.com – one hour tutorials for all ages
  • scratch: way to get kids involved with coding. takes puzzle pieces and put them together to see something happen
  • kids can use coding to create a story
  • Codemonkey – for much younger learners . introductory tool for coding (ages 4-6)
  • can teach coding without access to computers as well

Coding Apps for class:


**For next class: write a story about yourself teaching in the year 2040**

November 15th Class Notes

Video Conferencing:

Dr. Verena Roberts – University of Calgary

Here are the few notes I was able to take from our talk with Verena, before we ran into connection issues:

  • Dissertation on open educational practices – expand learning beyond the walls of the classroom
  • Presentation on Introducing Open Learning Design Intervention (OLDI)
  • How can we access learning opportunities *everywhere* and allow access to the students
    • Learning is learning
  • Kids creatively change what they do with an artifact over and over again
  • Stages of OLDI
    • Teachers & students must be reflective (journals, podcasting)
    • Stage 1: must build relationships for learning to happen. Find out who these students really are. Get to know students & their personalities
    • Stage 2: Co-Designing learning pathways
    • Stage 3: Building & Sharing Knowledge: how to they show their learning
    • Stage 4: building their own personal learning network
  • Expanding Open Educational Practices in High School Learning Environments
    • Classroom –> Community –> Networks
  • Solve community problems
  • Start young! Start in Kindergarten

Unfortunately, the presentation was interrupted due to some technical difficulties, so we were not able to get the full experience. It was a great learning experience, though, to know what we could run into when trying to do video conferencing. It is important that both parties have a strong internet connection, and should ideally be wired right into it. All background apps should also be turned off, as much of the connection issue with Verena was tied to her Dropbox trying to upload at the same time. And always make sure there’s a backup option! She was trying to phone in once video conferencing was proving too difficult, but then was missing access codes, which took up even more time. Who knew there was so much to consider to complete a simple video call!


Class Presentations:

Distributed Learning:

  • Can be done with the robotic presence (as we’ve seen in class).
  • Configurations in face-to-face classrooms – directed to focus on teacher generally
  • Online courses – often no interaction between students and teacher
    • synchronous video is a great way to be able to have conversations with students throughout the course
  • Deficiencies in every model
  • Every connection to teaching environment with video conferencing is completely dependent on the connection to the internet
  • Traditionally had only had 2 options for learning: face to face vs online
    • Now blended options are becoming available
  • Multi-Access: using technology like Remote access robot to still engage in class even if not able to physically be present
  • Need to think about ways to support all learners, and create ways for them to learn in the best way possible – if going to class causes anxiety, need to promote other ways that students can still be engaged
  • Using technology for education has environmental perks as well — cuts down on travel, especially for students in remote areas


Presentation on ‘OpenEd Resources for Lesson Planning’:

  • To produce, share, and build knowledge
  • Resources are easily available and equity of knowledge for learners and educators
  • All dependent on access to technology, and copyright use needs to be closely moderated
  • CommonSense Education
    • Independent non-profit organization
    • very up to date
    • CommonSense Education
      • Teachers can use to locate webinars for pro d
        • Universal Design
        • Privacy Training
        • How to teach students about red flags online
      • Lesson plans for teaching about digital citizenship
        • can find tailored apps that include utilizing and integrating technology into your classroom
          • breaks down what apps you’ll need and when to use them
        • Can see reviews on educational videos
      • Can locate median and tools to use in classrooms
        • like book creator for students to create own digital storybooks
      • Can access articles on TechEd topics


Presentation on  ‘How integrating technology affect students’:

  • Relation to teaching and learning
    • when technology integration is seamless, increases student engagement, and are able to take more control of their learning
    • Can’t assume that all students know how to use technology
    • using devices allows all students with the opportunity to make deeper connections with learning content
    • Must be mindful of when to unplug
      • studies are now showing that screen time do not have the negative effects that some people claim
        • Internet shutdown in Korea – only saved just over 1 minute of sleep
  • Pros & Cons:
    • Pros:
      • Opportunity to engage with students if you get involved as well
      • Build a relationship
    • Cons:
      • Screens can be a distraction in class
      • Content could be worrysome – screens are not the issue, it’s what kids are able to access
  • Risks?
    • Need to focus more on content on screens than the screens themselves
    • time spend on screens has to be quite substantial (greater than 5 hours per day) to have effect on psychosocial abilities
    • Slenderman video – extreme example
  • Tips & Best Practices
    • Need to know where students are at with their exposure to technology
    • Important to discuss internet safety
    • Be sure to test-drive any form of technology you may intend to use in the classroom
    • Use of technology needs to routine and transparent
    • Access must be widely available
    • Should be used to support the curriculum


Presentation on ‘3D Design and Print’:

  • Able to be applicable to protestics
  • Modelling 3D objects, printing 2D layer by 2D layer. Printing usually takes 4-18 hours (30 mm/second)
  • Need software to be able to create 3D prints
    • Tinkercad – easily accessible software
    • More complex:  Onshape
  • Can get pre-designed models (Thingiverse)
  • Need the hardware as well – the physical 3D printer
    • Could do it for as cheap as $1000 for total setup, but would be very poor quality.
  • Materials:
    • PVA – Polyvinyl Alcohol, water soluable material
    • TPU – Thermoplastic Polyurethan, not foodsafe
    • PLA – Polyactic Acid (best for environment), what’s used at UVic
  • Pros:
    • Easy fabrication of complex shapes
    • no cost to students
    • allows for customization
    • less waste production
  • Cons:
    • temperature (200 degree heat while printing), so needs to be kept away from young kids
    • time to complete, especially if using cheaper machines
    • cost — quality and size increases with cost
    • less cost effective for making multiples of something – injection model would be better for this still
  • Techniques:
    • Supporting: support structures for more intricate parts of design
    • Bridging: small filaments connect to connect 2 parts of shape (ie. chains)
    • heating to mold printed shapes
    • can recycle filaments, so they can be re-purposed if didn’t like original shape (make back into filaments)
  • How to bring into schools:
    • Engineering
    • architecture
    • print out artifacts for social studies
    • for cooking, could create molds or cookie cutters
    • print out 3d molecules for chem
    • universal design applications (ie. visually impaired)
  • Links to Core Competencies

Dot Painting

As I peruse Pinterest, I often see these neat looking ‘dot paintings’, (as featured here in a quick google images search).

For this week’s art project, I decided to make myself a Christmas themed dot painting, that I’ll be able to happily display much earlier than is socially acceptable.

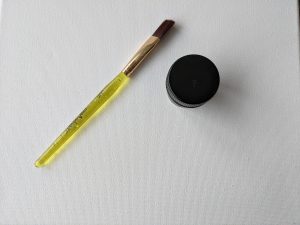
I started with an inexpensive canvas from the dollar store – a wonderful art product that could be used for an entire class to make their art feel a little more special.

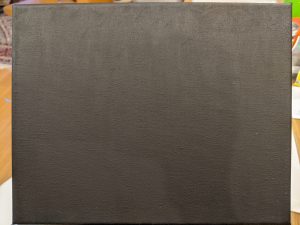
Then I painted it black so that my dots would really pop:

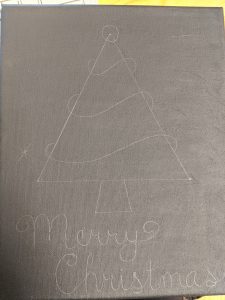
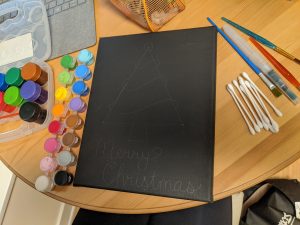
Then I outlined the design in pencil. The great thing about doing this craft with kids, is that the outlines can be very simple, but the end result looks much more interesting!

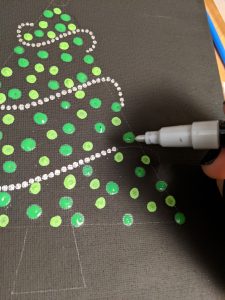
Then I dotted away!

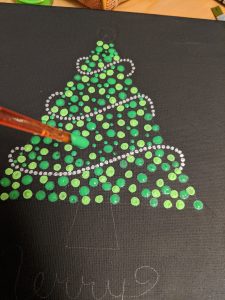
And dotted some more…

Bejeweled a little:

Aaaand a few more dots:

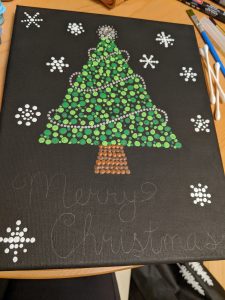
Added a little writing to mix things up:

And voila! My festive dot painting is complete!

Remembrance Day Craft

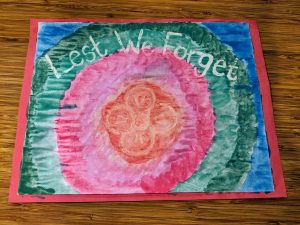
Well… I felt inspired after learning a crayon/watercolour technique in a recent art class, to replicate it somehow in relation to Remembrance Day. I didn’t have a clear plan in mind, but just decided to go for it, with a white crayon and some paint… This project proved to be another valid learning experience for me — ALWAYS HAVE A CLEAR VISION BEFORE STARTING AN ART PROJECT.

I didn’t think too much of the logistics behind the project, and I was not happy at all with the end result (in fact, I threw it out right away to hide the evidence of my failed attempt).

Here is the process of my failed painting:

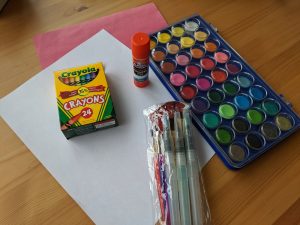
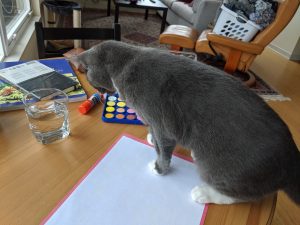
My materials:

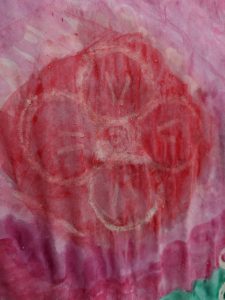
I began by drawing out my crayon design in white:

My cat wanted to “help” with the project too..

Then added water colour paint… This was the point when I realized I had messed up. With this idea, I should have filled in the poppy with crayon, not just outlined it. I also didn’t had enough wax crayon to the poppy, so the paint covered the majority of it.

Then I lost all hope for this, and just finished the project with some odd looking tye-dye style painting.

The intention was there.. but I’m definitely glad this was not a craft idea that I brought into a classroom before trying it out for myself! Yay for learning!

Technology In the Classroom

SAMR Model:

Can think of tech as a substitution for some pen/paper activities in the classroom. Not changing the activity at all.

Can augment a lesson with the use of technology to be able to gain a deeper understanding.

  • these two tools act to enhance the lessons you’re using

Can modify lessons around the use of technology

Can redefine the tasks you focus on into a way that was previously not conceivable

  • using these techniques transforms the way you approach lessons due to the use of technology

Image result for samr

(Photo retrieved from sylviaduckworth.com)


TPACK (Technological Pedagogical Content Knowledge) Model:

Image result for tpack


November 18th Presentations

Stop Motion Animation:

How to bring it into the classroom:

  • using an ipad, moving post-it notes and moving at timed intervals across the floor.

StopMotion: free app you can download to help take pictures

Then animated the pictures through Photoshop

  • Go into window tab
  • Go into timeline
  • create different layers
  • Use twinning botton to make it look like object is moving from point A to point B (instead of having to take many more photos of the object in slightly different spots
  • used IMovie to overlay photos transitioning into animation

Pros:

  • can use it cross-curricularly: math, p.e, etc. – makes learning fun and exciting

Cons:

  • if you’re limited in the amount of technology you can use
  • can be frustrating (projects getting deleted, or not working how you intended)

Things to watch out for:

  • using bluetooth remote to take pictures so there’s no movement of camera
  • take your time

Resources:

  • makerspaceforeducation.com
  • iste.org
  • sites.google.com/site/waldoportfolio
  • wiobyrne.com
  • blog.ed.ted.com
  • onf-nfb.gc.ca
  • education.microsoft.com


Bringing Digital Mapping into the Classroom:

  • Google My Maps: focuses on putting information into maps instead of just getting information out of google maps.
    • Good for letting kids create their own maps
    • calculate area, colour code areas, points of interest, can add photos and videos to icons
    • make maps about family heritages, map languages, fictional settings, field trip planning
  • Google Street View:
    • Natural wonders
    • walk through museums
    • Google Cultural Institute
  • Google Earth vs Google Maps
    • Google maps is more utility
    • google earth is experience over utility, gives high resolution 3D experiences
    • flight simulator
    • View the Past – see how the land has changed over the past 15-20 years
    • Make different layers : ie. endangered habitats/species
    • Google Moon, Mars, and Sky – immersive interactions with all the space missions, narrated by people who did the missions
    • Voyageur: curated tours of various places around the world (ie. Jane Goodall and chimpanzees)
  • Lesson Planning/Project Ideas:
    • 20 questions
    • real-world math
    • global awareness layer
    • can create a scavenger hunt – through coordinates
  • Can build off curriculum
    • for example, to follow the routes explorers traveled during the gold rush
    • historical timeline
    • add pictures or link to videos to help represent historical context
  • Be informed:
    • google maps has a lot of information about you
      • google can track you if you don’t opt out
      • if you take pictures during your day, will link in to your day and can few infinitely
    • Google Earth doesn’t automatically track you


Digital Literacy and how to teach it in the Classroom:

  • Digital literacy is information literacy : what is real and what is fake
    • know the quality of the websites they’re encountering
    • think critically about information being presented – how much bias is on the site they’re exploring
    • how to properly cite the online information you’re using – what information you can use and what information is copyrighted
    • understanding digital footprints (what you’re leaving behind when you use the internet – ie. cookies, search history, etc)
    • how to properly protect yourself on the internet – how everything on the internet is permanent
    • how to properly handle digital communication – don’t let the screen dehumanize your behaviours and interactions
      • cyberbullying: the steps students should take and how teachers should react
  • Pros, Cons, and Risks:
    • tech usually increases motivation, doesn’t use paper (yay environment), endless resources
    • tech can involve many distractions if not monitored, can encounter innapropriate content more easily
    • cyberbullying is a big risk, digital footprints, and that everything posted is permanent
  • Strategies, Tips, and Best Practices:
    • Crash Course videos great for:
      • Lateral reading: if you find information on the internet, you read other sources around the internet to ensure that the information is actually legitimate and free of bias
      • Fact checking
      • Evaluating Evidence
    • MediaSmarts.ca – Canadian specific content for internet safety and lesson planning
    • Including student choice and voice in how you incorporate digital literacy
    • A focus on more creation than consumption – will be naturally more aware of privacy issues
    • Focus on multi-modality – try to include more than just 1 tech focus
    • Ensure accessibility for all learners — provide class time! Don’t expect students to use technology at home. Have assisitive technology for tech programs (UDL)
    • Getting them involved in the community outside of school – citizen science
    • teaching skills for social media and peer-to-peer interactions online
    • related to core competencies
      • Digital literacy is part of the BC Curriculum – helps with communication with parents who may have reservations
  • Using digital literacies to help educate about sex education
    • Help guide students to useful resources around the topic of sex education, so they they’re not coming across information that gives them a skewed perception based on a single story
    • using websites to complement the discussions that are necessary to have in class


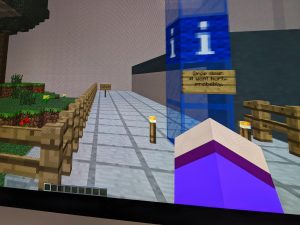
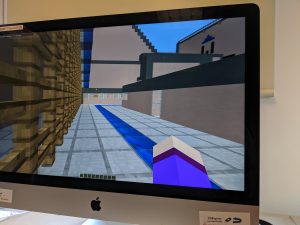
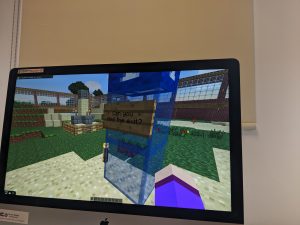
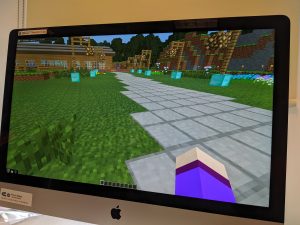
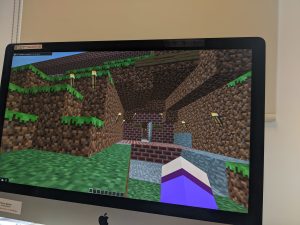
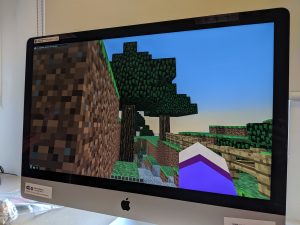
Minecraft EDU Presentation – Colquitz Middle

Minecraft is very popular among kids now

  • Kids exchange IP addresses to be able to collaborate together

Educational resources using Minecraft as a teaching tool (ie. able to explore city of Florence).

Presentation from Heidi James & her students: grade 7 teacher at Colquitz Middle School

  • Had students request through the principal to bring a Minecraft server into the school ($5000)
  • Have kids of all ages come to the computer lab to be able to share in the Minecraft EDU (kids from other schools come to use the Minecraft EDU server)

Classroom Minecraft EDU experience:

  • all students log into the same learning world which brings all students into a Tutorial World. It guides you through a step by step world of building on new skills as you go.
  • After learning all the basic movement skills (like using the mouse as your eyes)
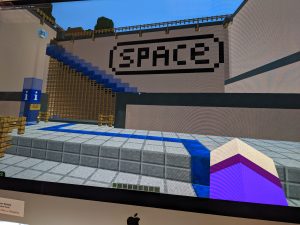
  • Once all students have worked their way through the entire tutorial world, they are placed into a real world where they can put their learned skills to use.
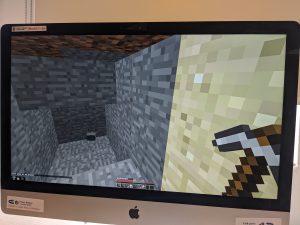
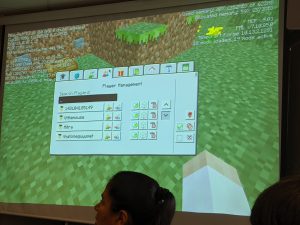
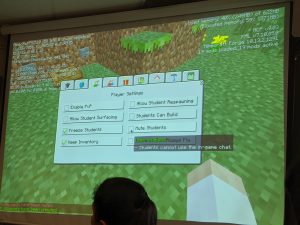
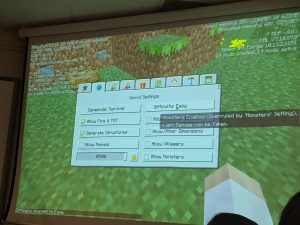
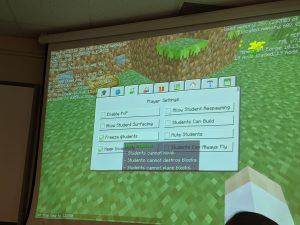
  • Teachers are able to control all aspects of the game, such as pausing all students, muting their chat (if spamming or being innapropriate), choosing what they encounter in their worlds (survival mode, creative mode, monsters, nighttime, etc)
How Minecraft EDU connects to core competencies:

Communication – within the game (chat), as well as lots of communication within the classroom. Students help eachother through the game, and must communicate to help with crafting recipes.

Problem Solving – working with their team to solve problems together. Leaders can give hints to help groups solve the problems they encounter without giving away all the details.

  • ie. for crafting, instead of just giving people the crafting recipes, you provide them with what products they needs, but not the amounts or how to get them, so there is still the self-exploration aspect and learning that takes place.

Collaboration/Cooperation – Because all students are placed into the same world, must work together to ensure the world runs smoothly. For example, to be able to sleep and avoid the monsters at night, all students must build beds, and all must sleep at the same time.

How the kids have learned from Minecraft EDU:

  • The class struggled with building a sense of community, but the game helped with this immensely. If you didn’t work together, you wouldn’t be able to progress.
  • They learned a lot of agriculture through it (you need food to survive, so have to get seeds, then have to tend to the seeds. Need to know how to tend to animals – have to have a fence around your animals or they escape)
  • For school, everyone had to have a bed and be asleep for even 1 person to be able to sleep — going back to cooperation
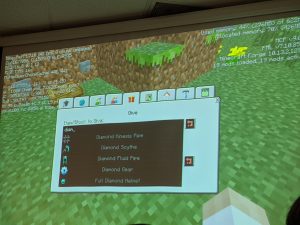
  • For grade 7 math have to teach the x,y coordinate grid. In Minecraft, you get the opportunity use a 3D x,y coordinate grid within the game.
    • Not only incorporated social studies core competencies, but also math
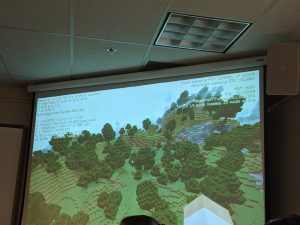
(3D x,y coordinates in top left corner)

Example of a Minecraft EDU Project: Ancient Egyptian Civilizations – 5 week project, 2-3 hours/week

    • Split into groups, and assigned leaders to each group to act as the Pharaohs of the civilizations.
    • Teacher assigned very few resources just to the Pharaohs (a small amount of food, and 1 weapon), and the rest of the group had to survive with no resources at all. Pharaohs were in charge of deciding how to split up resources that would benefit the entire civilization most.
    • All groups went to different locations to build their civilizations, and matched real world experiences with the experiences they would encounter in the game. For example, being killed by zombies was representative of being murdered by another human in the Ancient Egyptian civilization.

Painting with Youngsters – A Learning Curve

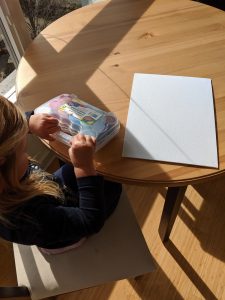
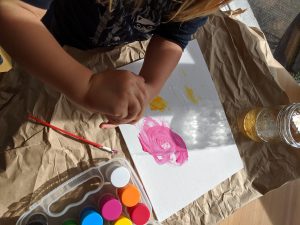
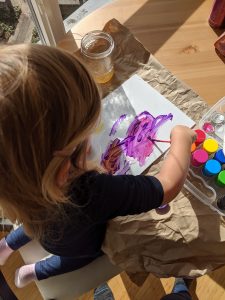
This past weekend I got to babysit my oldest niece, and decided it would be fun to do some painting with her.

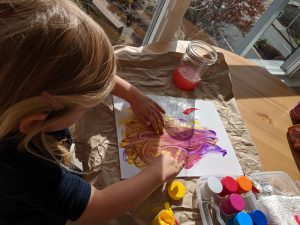
I set everything up nice and organized, with paper underneath to protect my table, a brush, and cleaning water. Did all this help contain the mess in the long run… No.

What I soon realized is, you can’t keep a two and a half year old’s attention to paint while trying desperately to clean the brush between each colour, and keep her mucky hands from touching everything. So my neatly envision paint activity soon turned into a finger painting mess. But that’s okay! She was enjoying it so much!

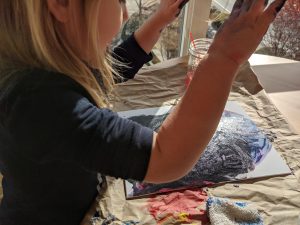
Another big lesson learned: hide the black paint! The final colour she dove into before losing interest was black.. And so follows the covering up of all the beautiful colours she had put on the canvas up to this point:

But did she ever love it!

« Older posts